it's been a busy week and I'm few days late posting this week's samples
but I've had a lot of fun with the crackle medium and crackle paste
and it was a real learning curve with mixed results and pleasant surprises
after clearing up in my studio last week ...
I came across a bottle of DecoArt Weathered Wood Crackling Medium
so, with no idea how many years I've had it or if it has a shelf life
I began sampling with that ...
I began sampling with that ...
I followed instructions to paint first then apply the crackle medium
a few minor bubbly textures appeared but on the whole nothing much
still, I discovered that the medium is great for creating a shiny glaze
which reflects the light and therefore adds a watery effect to my "beach streams" painting

next up ... another abstract painting with the crackle medium applied on top
for this one I waited till it was dry then zapped it with my heat gun to create some texture
areas of my painting bubbled up with the heat ... so I applied silver foil to the raised areas
overall I'm pleased with the finished effect even if it was not intended


still with the DecoArt crackle medium ...
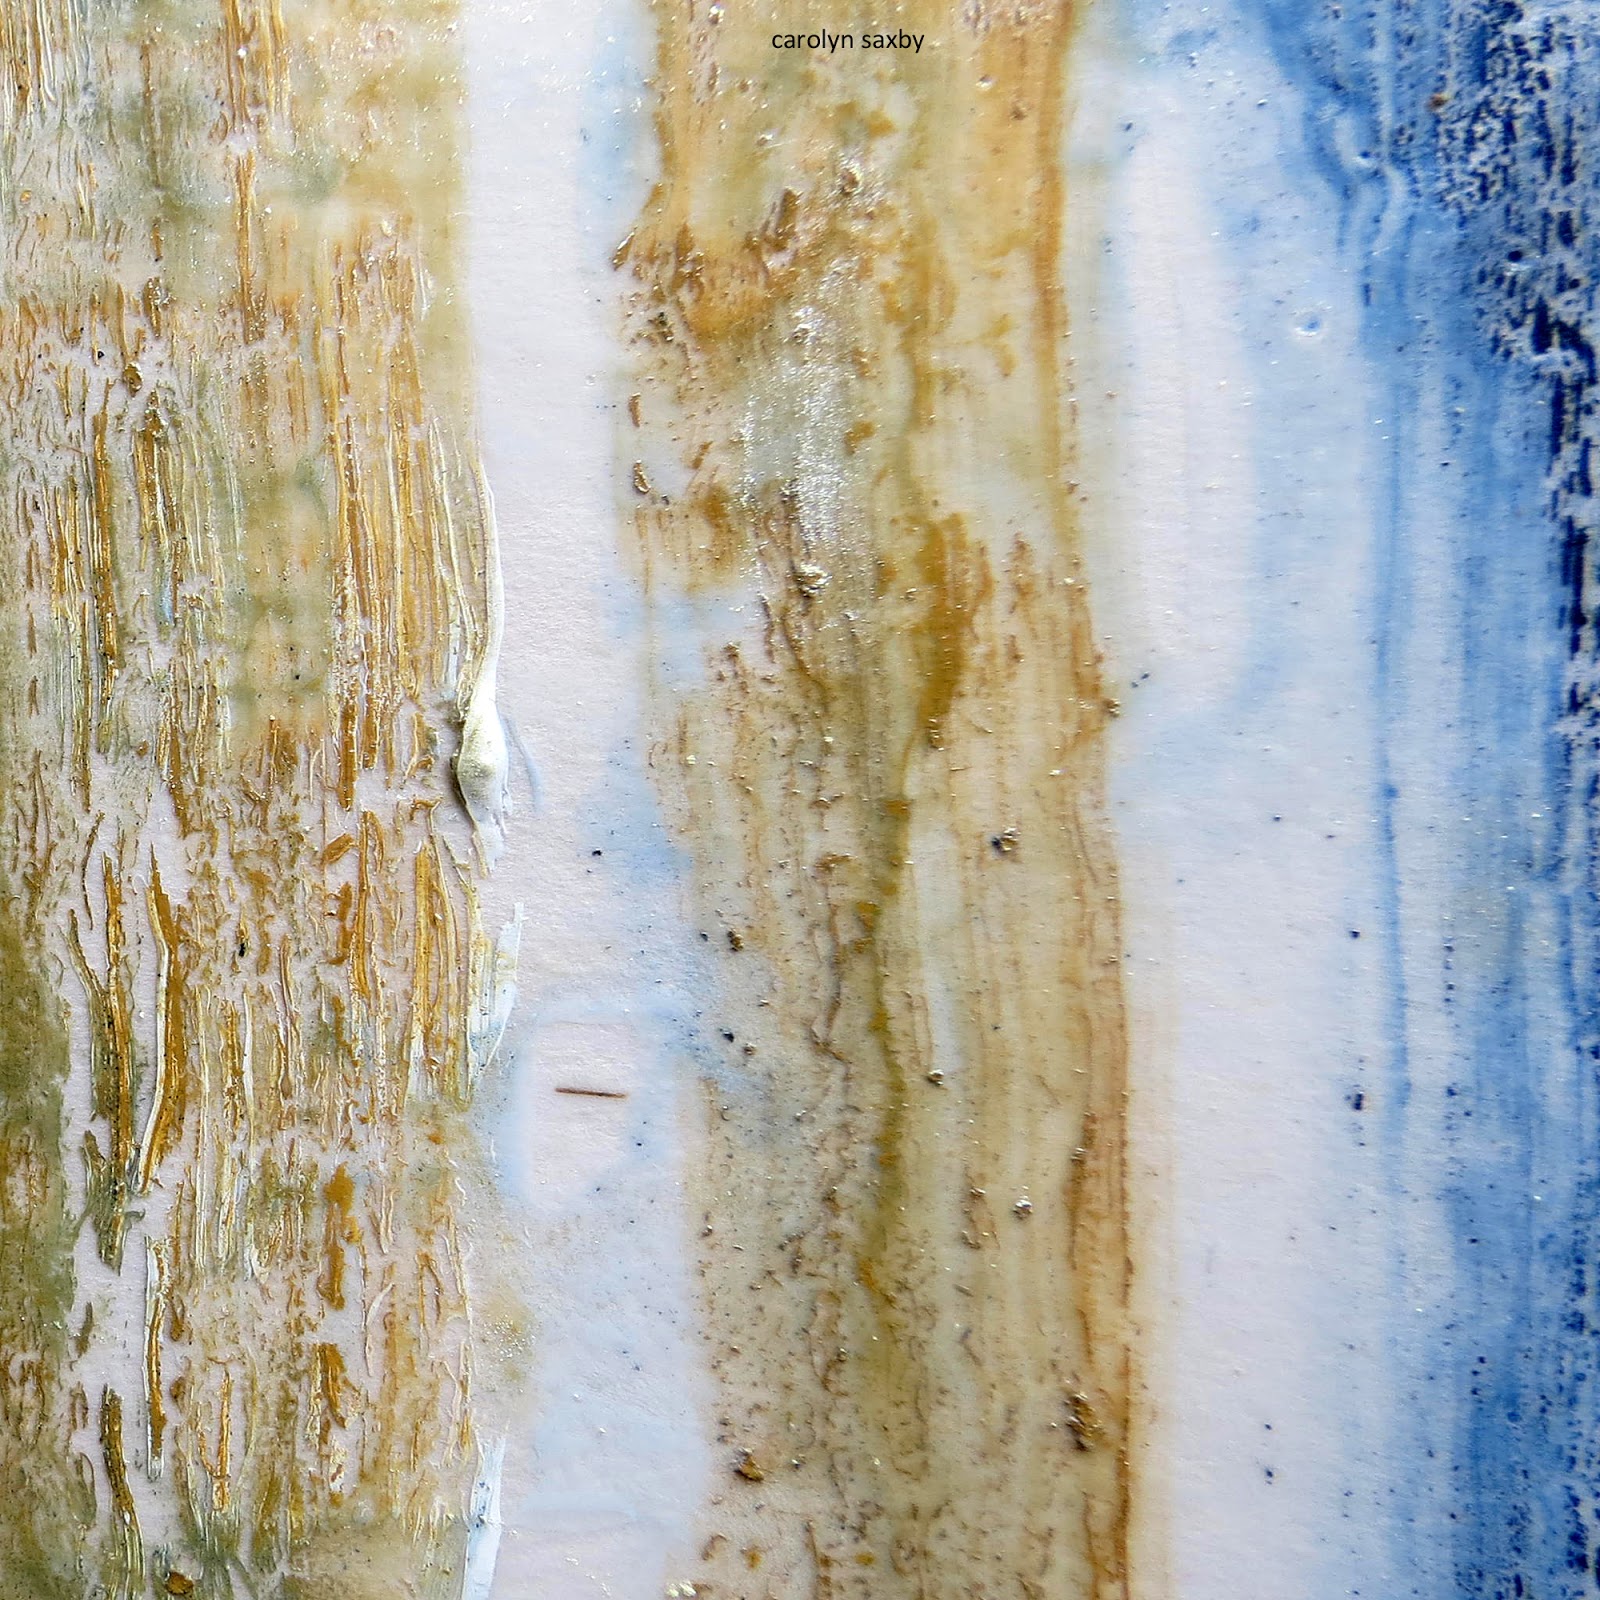
for the next sample I applied the crackle medium first and painted into it while still wet
using a brush I mixed the colours directly on my base
then heated the sample with a heat gun and ironed on more silver foil
I was pleased with the effect of the paint in the medium
which runs together in a similar manner to when you paint into pva glue
and does vaguely resemble a "weathered wood" texture with a bit of imagination
the original sample is much more interesting than my photos do justice

the sample below is more DecoArt Crackle Medium
heated with a heat gun before painting which created this texture below
(showing it coloured after I had painted it)

and this is the sample after I had applied silver foil
(I do like a bit of bling on an otherwise matt surface)

it was useful to try DecoArt Crackle Medium applied very thinly on a pastel seascape
the effects were quite faint which is great if a more subtle result is sought

below is the last of my samples with the DecoArt Weathered Wood Crackling Medium
I painted this seascape with sunrise with acrylics on mount board
then applied the crackle medium really thickly on top and left for 24 hours

this does appear to have a more weathered wood look
so I guess this is how the medium should be applied
the instructions on the bottle were not that clear
as to how much to apply ... hence the experiments
it worked well on the waves which look choppy with small "white horses"
and on the white/blue sky too (below)

the following samples below are with Golden Gel Mediums Crackle Paste
experimenting with different thicknesses of paste and applying with a brush and palette knife
the first thing I discovered was how patient you have to be waiting for the stuff to crack up
these samples were left drying out several days

the second thing I discovered was that the size and depth of the cracks
depend very much on how thickly the paste is applied
I felt I got much better results when the paste was applied with a palette knife versus a brush
perhaps because I favour a knife over a brush for acrylics anyway
and because I don't really like seeing brush strokes in the paste

the third thing I discovered is that paint just sinks into the cracks to the base layer
and therefore any depth of colour needs to be built up in several layers / applications

below ... adding another layer of watery acrylics

this is how it looks when dry (below) ...
you can see the depth of colour pales as it dries
overall I'm pleased with the crackle textures
but didn't really like the chalky feel of the surface
so I also experimented with different clear glazes on my sketchbook samples
trying Golden fluid matte medium, pva glue and the DecoArt Crackle Medium

I ran out of time for any more samples this week
as I've had to get some collages ready for faux encaustic (week 6)
but I may work some more crackle samples later with more intense colour and glazes
and it's good to try every angle of a material
my sister had some great results with the crackle paste this week

also this week I've been working some more on my St. Ives stitched collage
securing the fabrics with stab stitches and playing with the composition

since I took these photos I've stitched down the cottages
secured the rusted fabrics (which I found on the harbour beach)
and attached the shells, seaweed and vintage button
I was pleased with how the rusted orange lifted the neutral colours
it's coming along ...

I'll be back on Wednesday with The Surface Treatment Workshop
in week 6 we are exploring faux encaustic techniques which is rather exciting!
8 comments:
Loving that silver bling! Your experiments are thorough as always and such a joy to see. Keep up the wonderful work :-)
Angie
Amazing colours and textures
Love Chrissie xx
I'm so pleased to have found your blog, your posts are so interesting photos and descriptions. has motived me to get back into my studio. I'm a collage and textile artist in New Zealand but have just started experimenting with encaustics. My blog has been happening for so long, have been procrastinating about writing but now top of my list as I can see it is a great way to document my progress. Also just read a book called Your Inner Critic is a Big Jerk by Danielle Krysa, I have been listening to her podcast for 6 months, The Jealous Curator. So taking her advise and your inspiration. Thanks and keep them coming!
Lovely crackle paste samples!
Looks like you had lots of fun experimenting with these. Love the addition of the silver sparkle x
Beautiful samples Carolyn. I have some crackle medium I have never used. I think I will dig it out and have a play.
Looking forward to the faux encaustic technique!
The heat gun zap and shiny silver we marvelous. The crackle was clearly seen with the palette knife application, but I enjoyed the way you experimented to suit yourself. Love house and stitching on your St. Ive's piece. Like that pale blue roof. xox
Another wonderful series of samples Carolyn - I'm heading off to our local library site to see if they happen to have a copy of the book you're working from. Avid curiosity here!
Post a Comment